PostHog’s data pipelines add-on or a self-hosted version of PostHog is required for this integration to work.
Create a Loops destinations
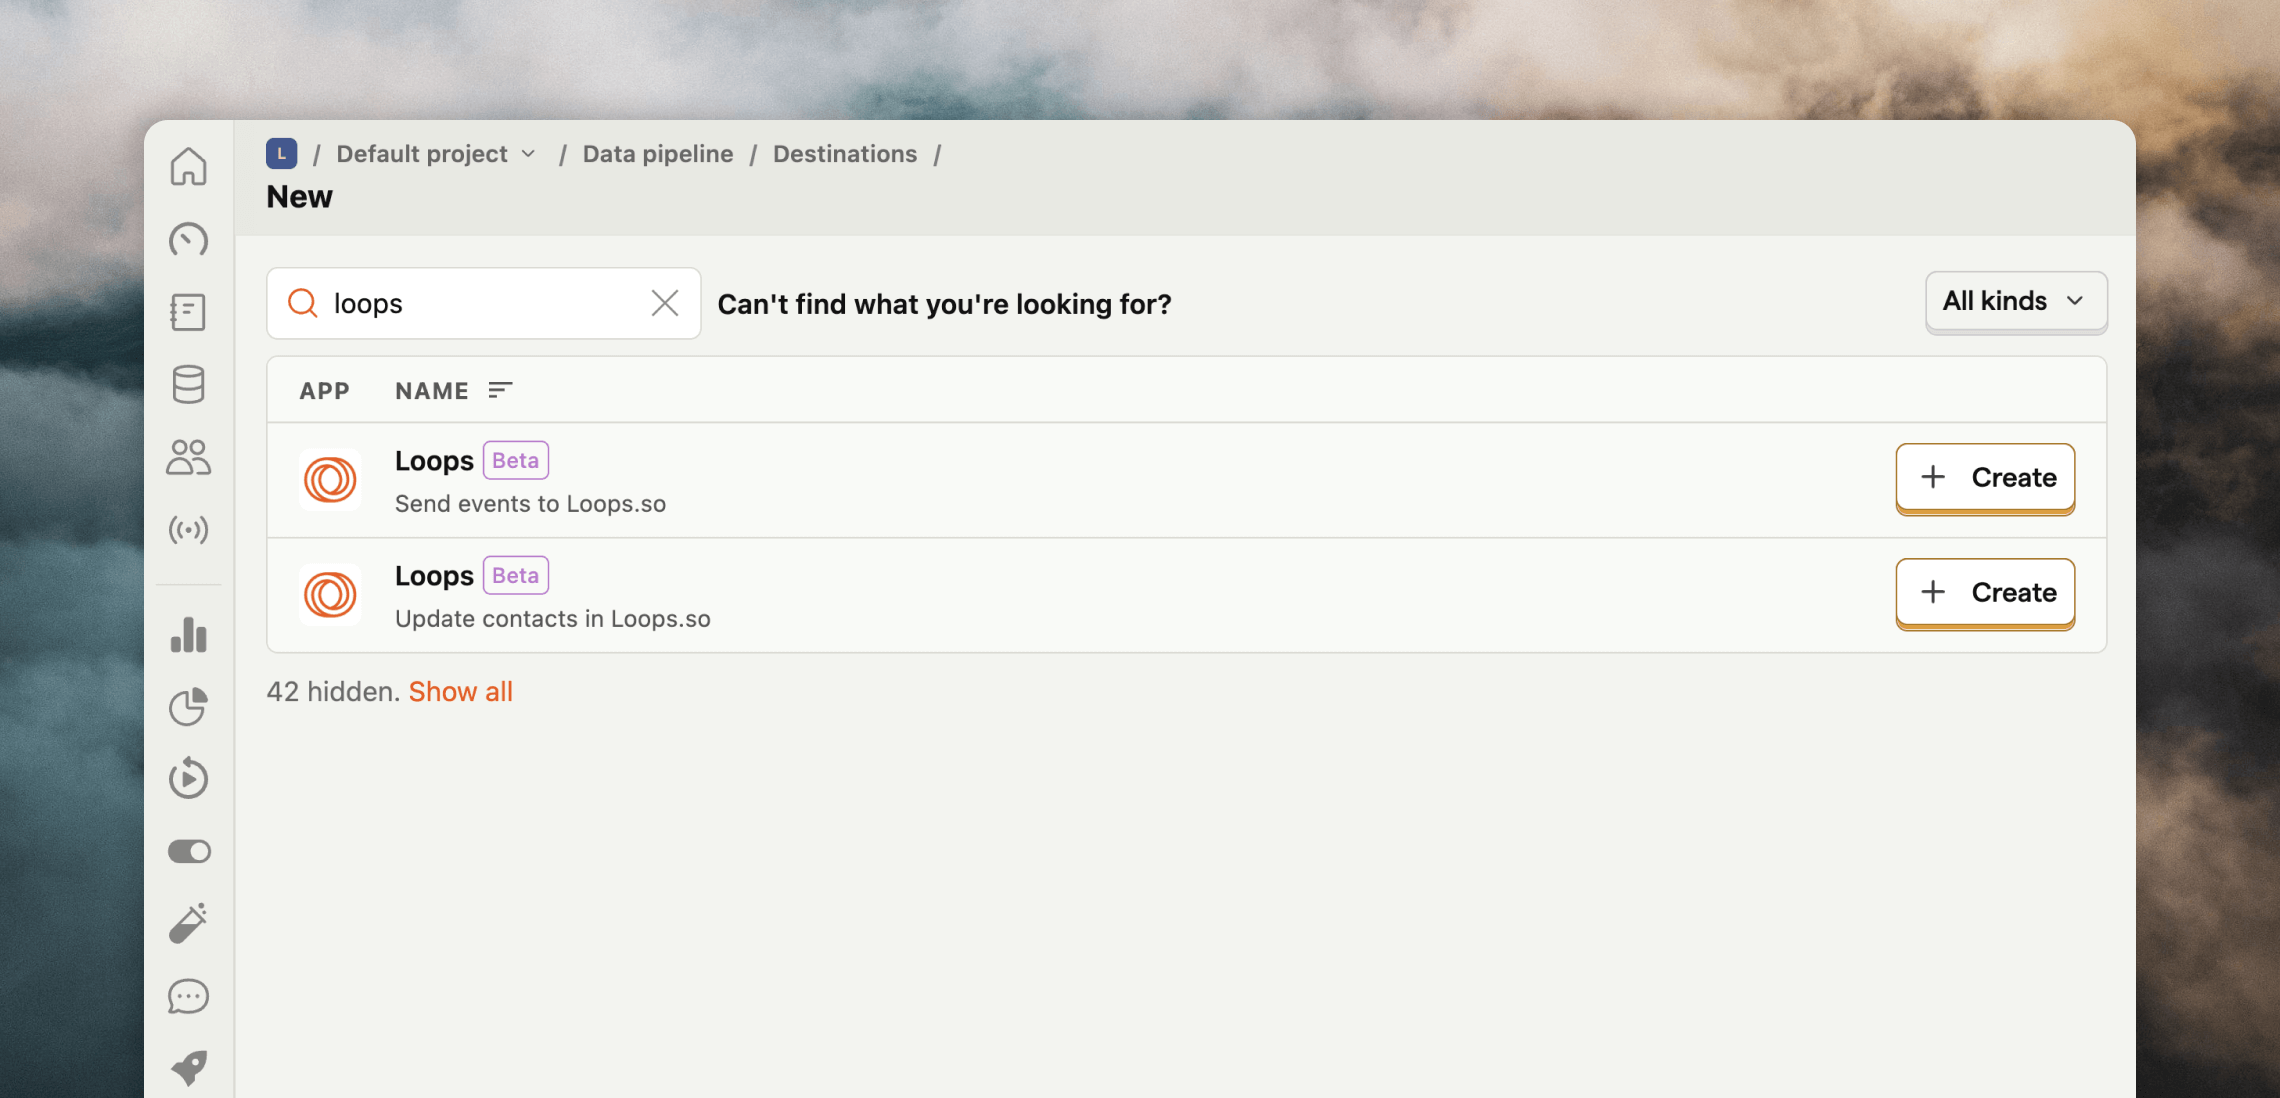
In your PostHog dashboard go to Date pipelines, click + New destination and search for “Loops”. You will see two options:- Send events to Loops.so (use this to trigger loops)
- Update contacts in Loops.so (this will create or update contacts in your Loops audience)
Add your API key
You need to add a Loops API to each destination so that PostHog can send data to your Loops account. In Loops, go to Settings -> API and generate or copy an API key. Back in PostHog, paste the API key in the Loops API Key field.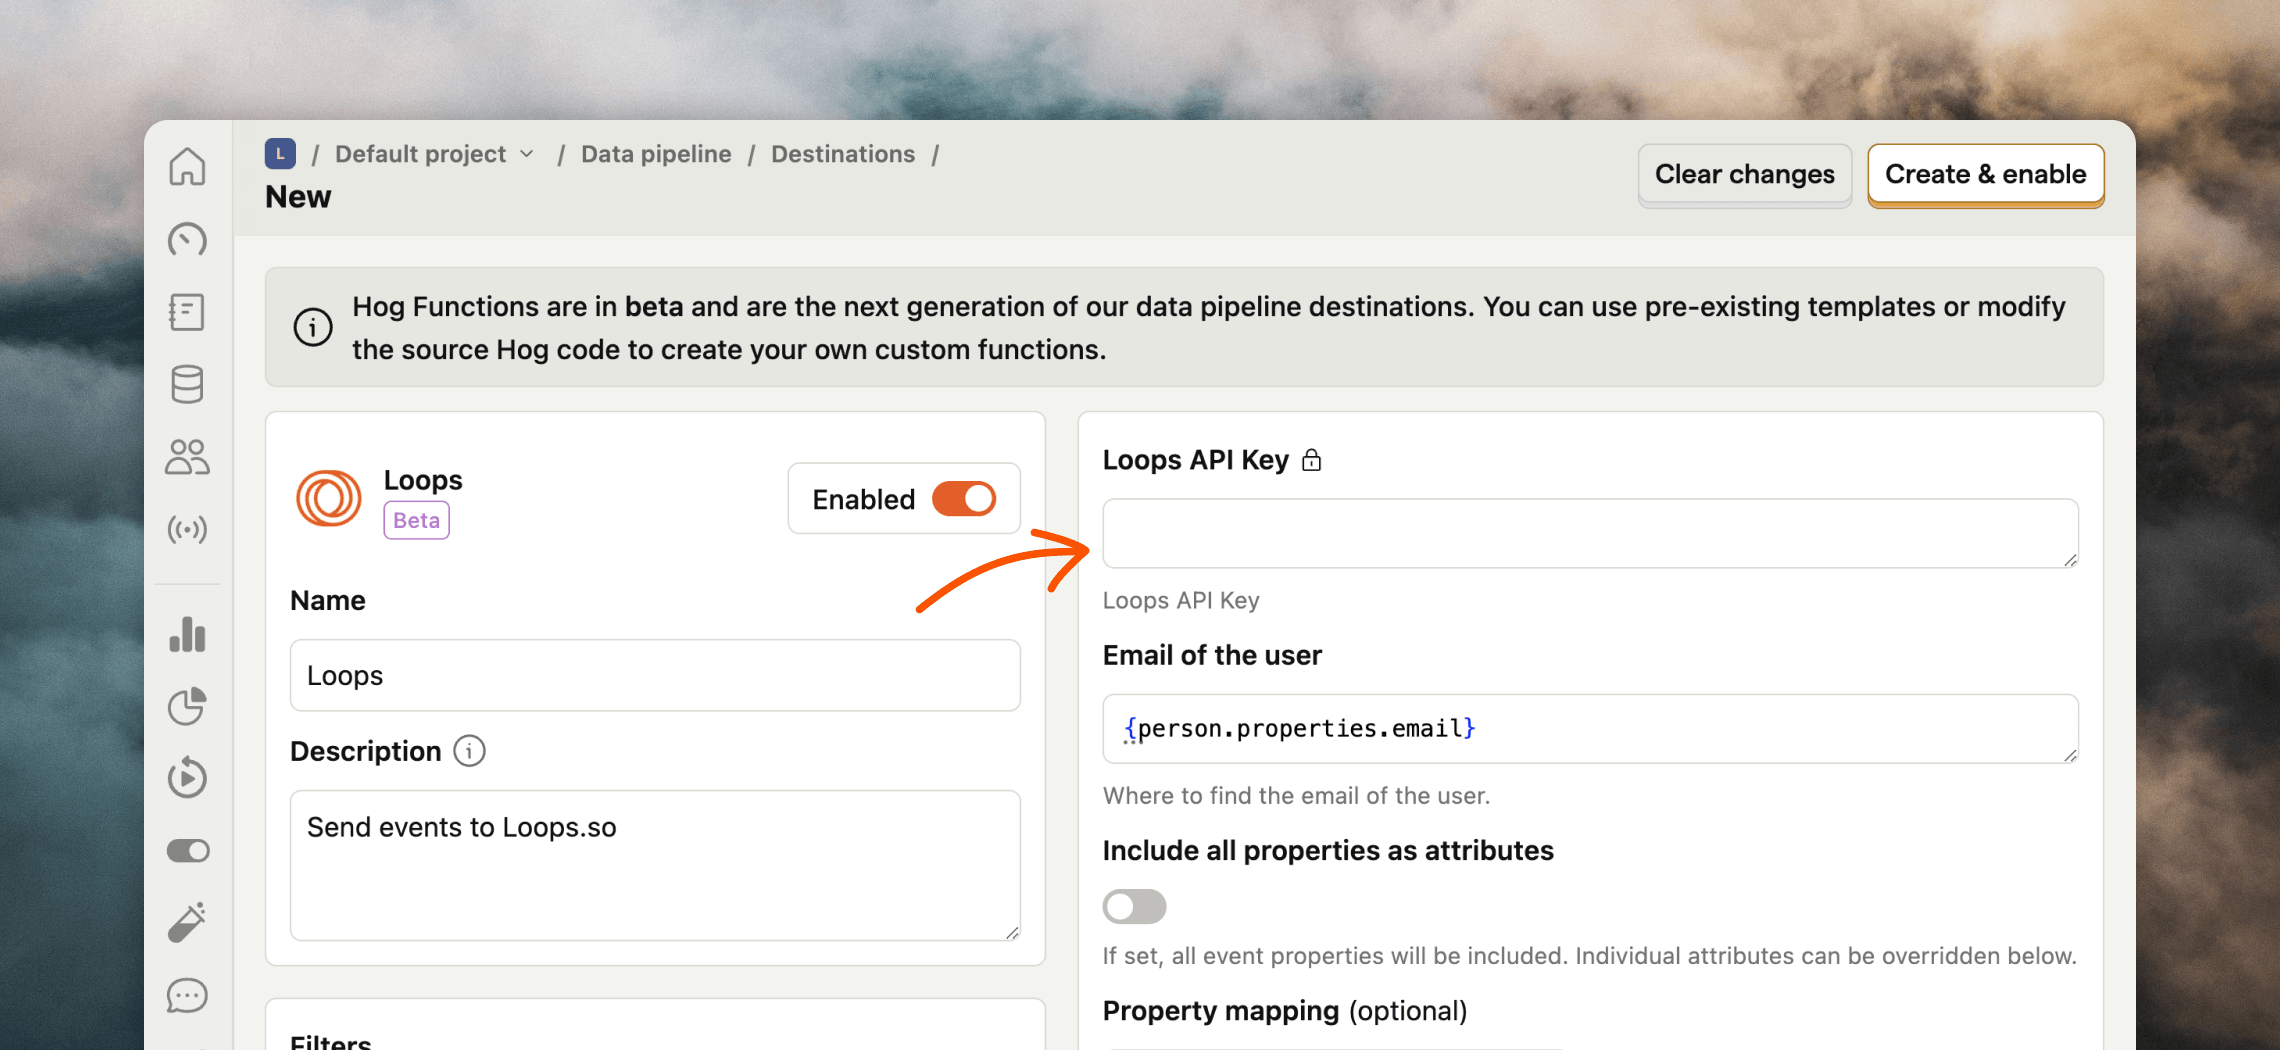
Customize the destination
There are a few options available to customize the data that is sent to Loops for both destination types. This helps make sure that you’re sending the correct data for your events and contacts.Send events
In the Send event to Loops.so destination, you can filter which events are sent to Loops from the Filters section. The default is “Pageview” (which is sent with the event name “$pageview” to Loops).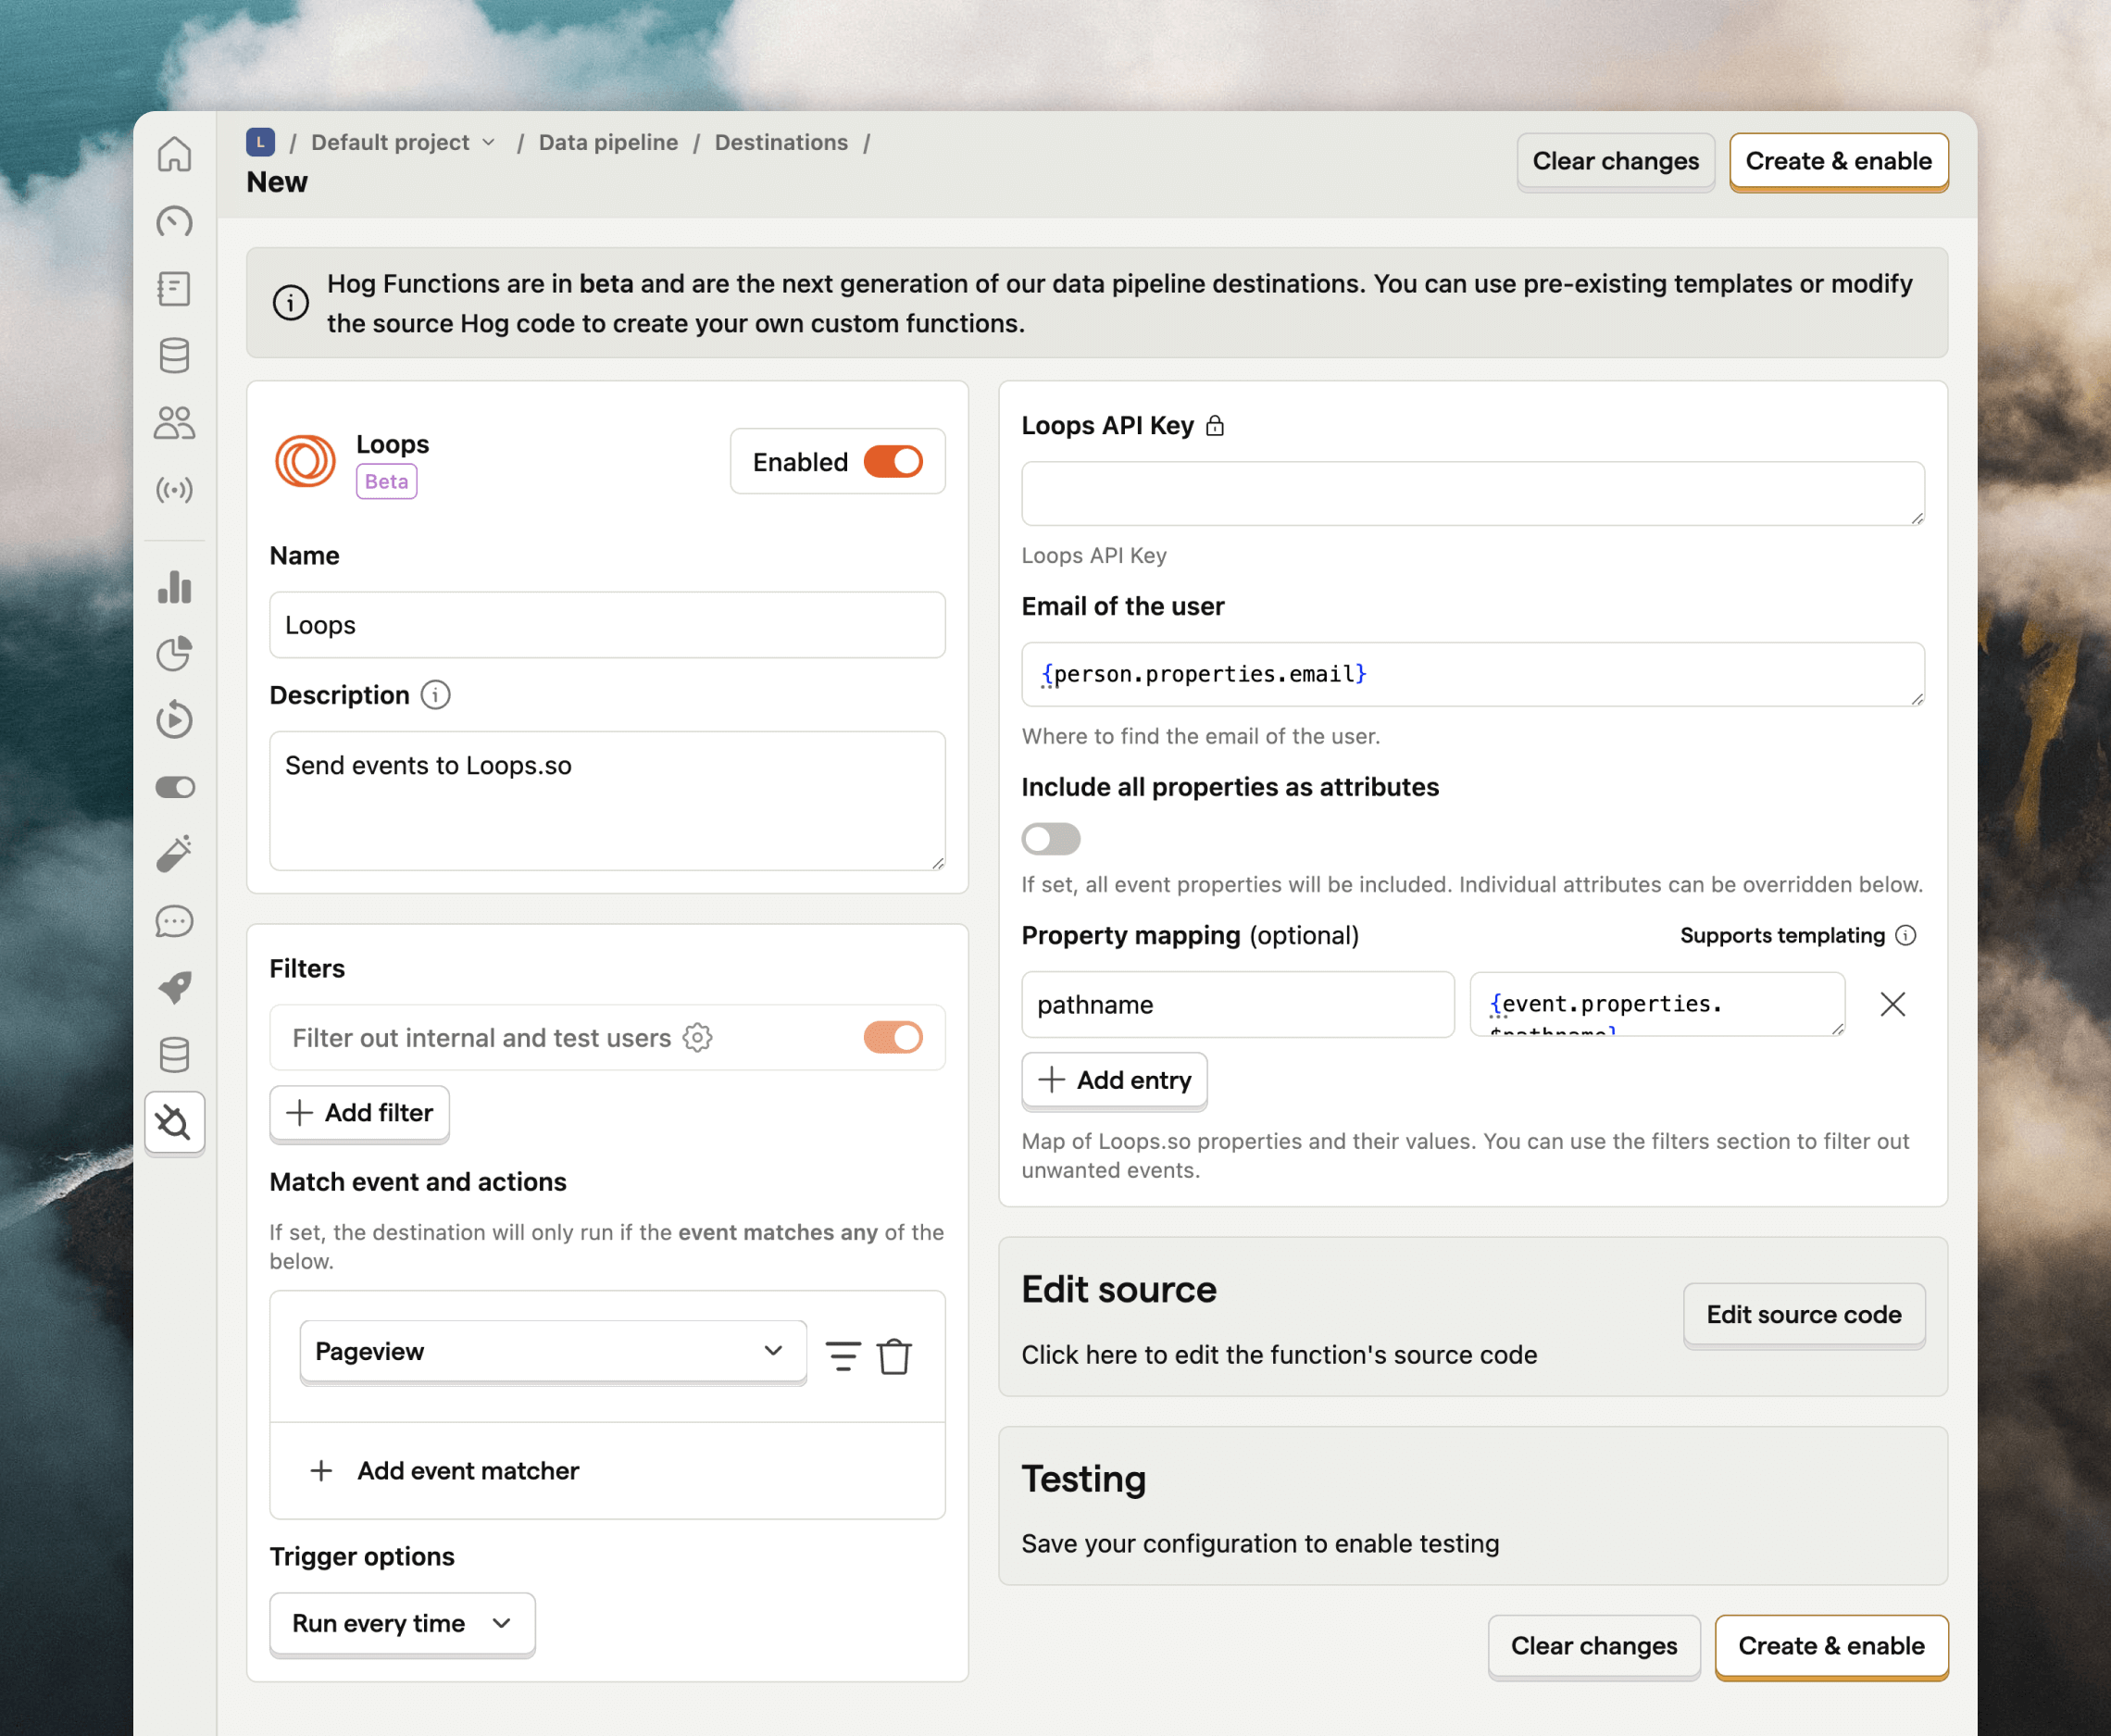
pathname is sent with the event as an event property, making it available in all emails triggered by the event.
If you want to add more event properties you can use the Property mapping option.
If you check the Include all properties as attributes option, all properties from the event will be sent to Loops.
Update contacts
The Update contacts in Loops.so destination lets you sync users to Loops. If a matching contact doesn’t already exist in Loops, one will be created. In this destination you can filter which events are sent to Loops from the Filters section. The defaults are “Identify” and “Set person properties”.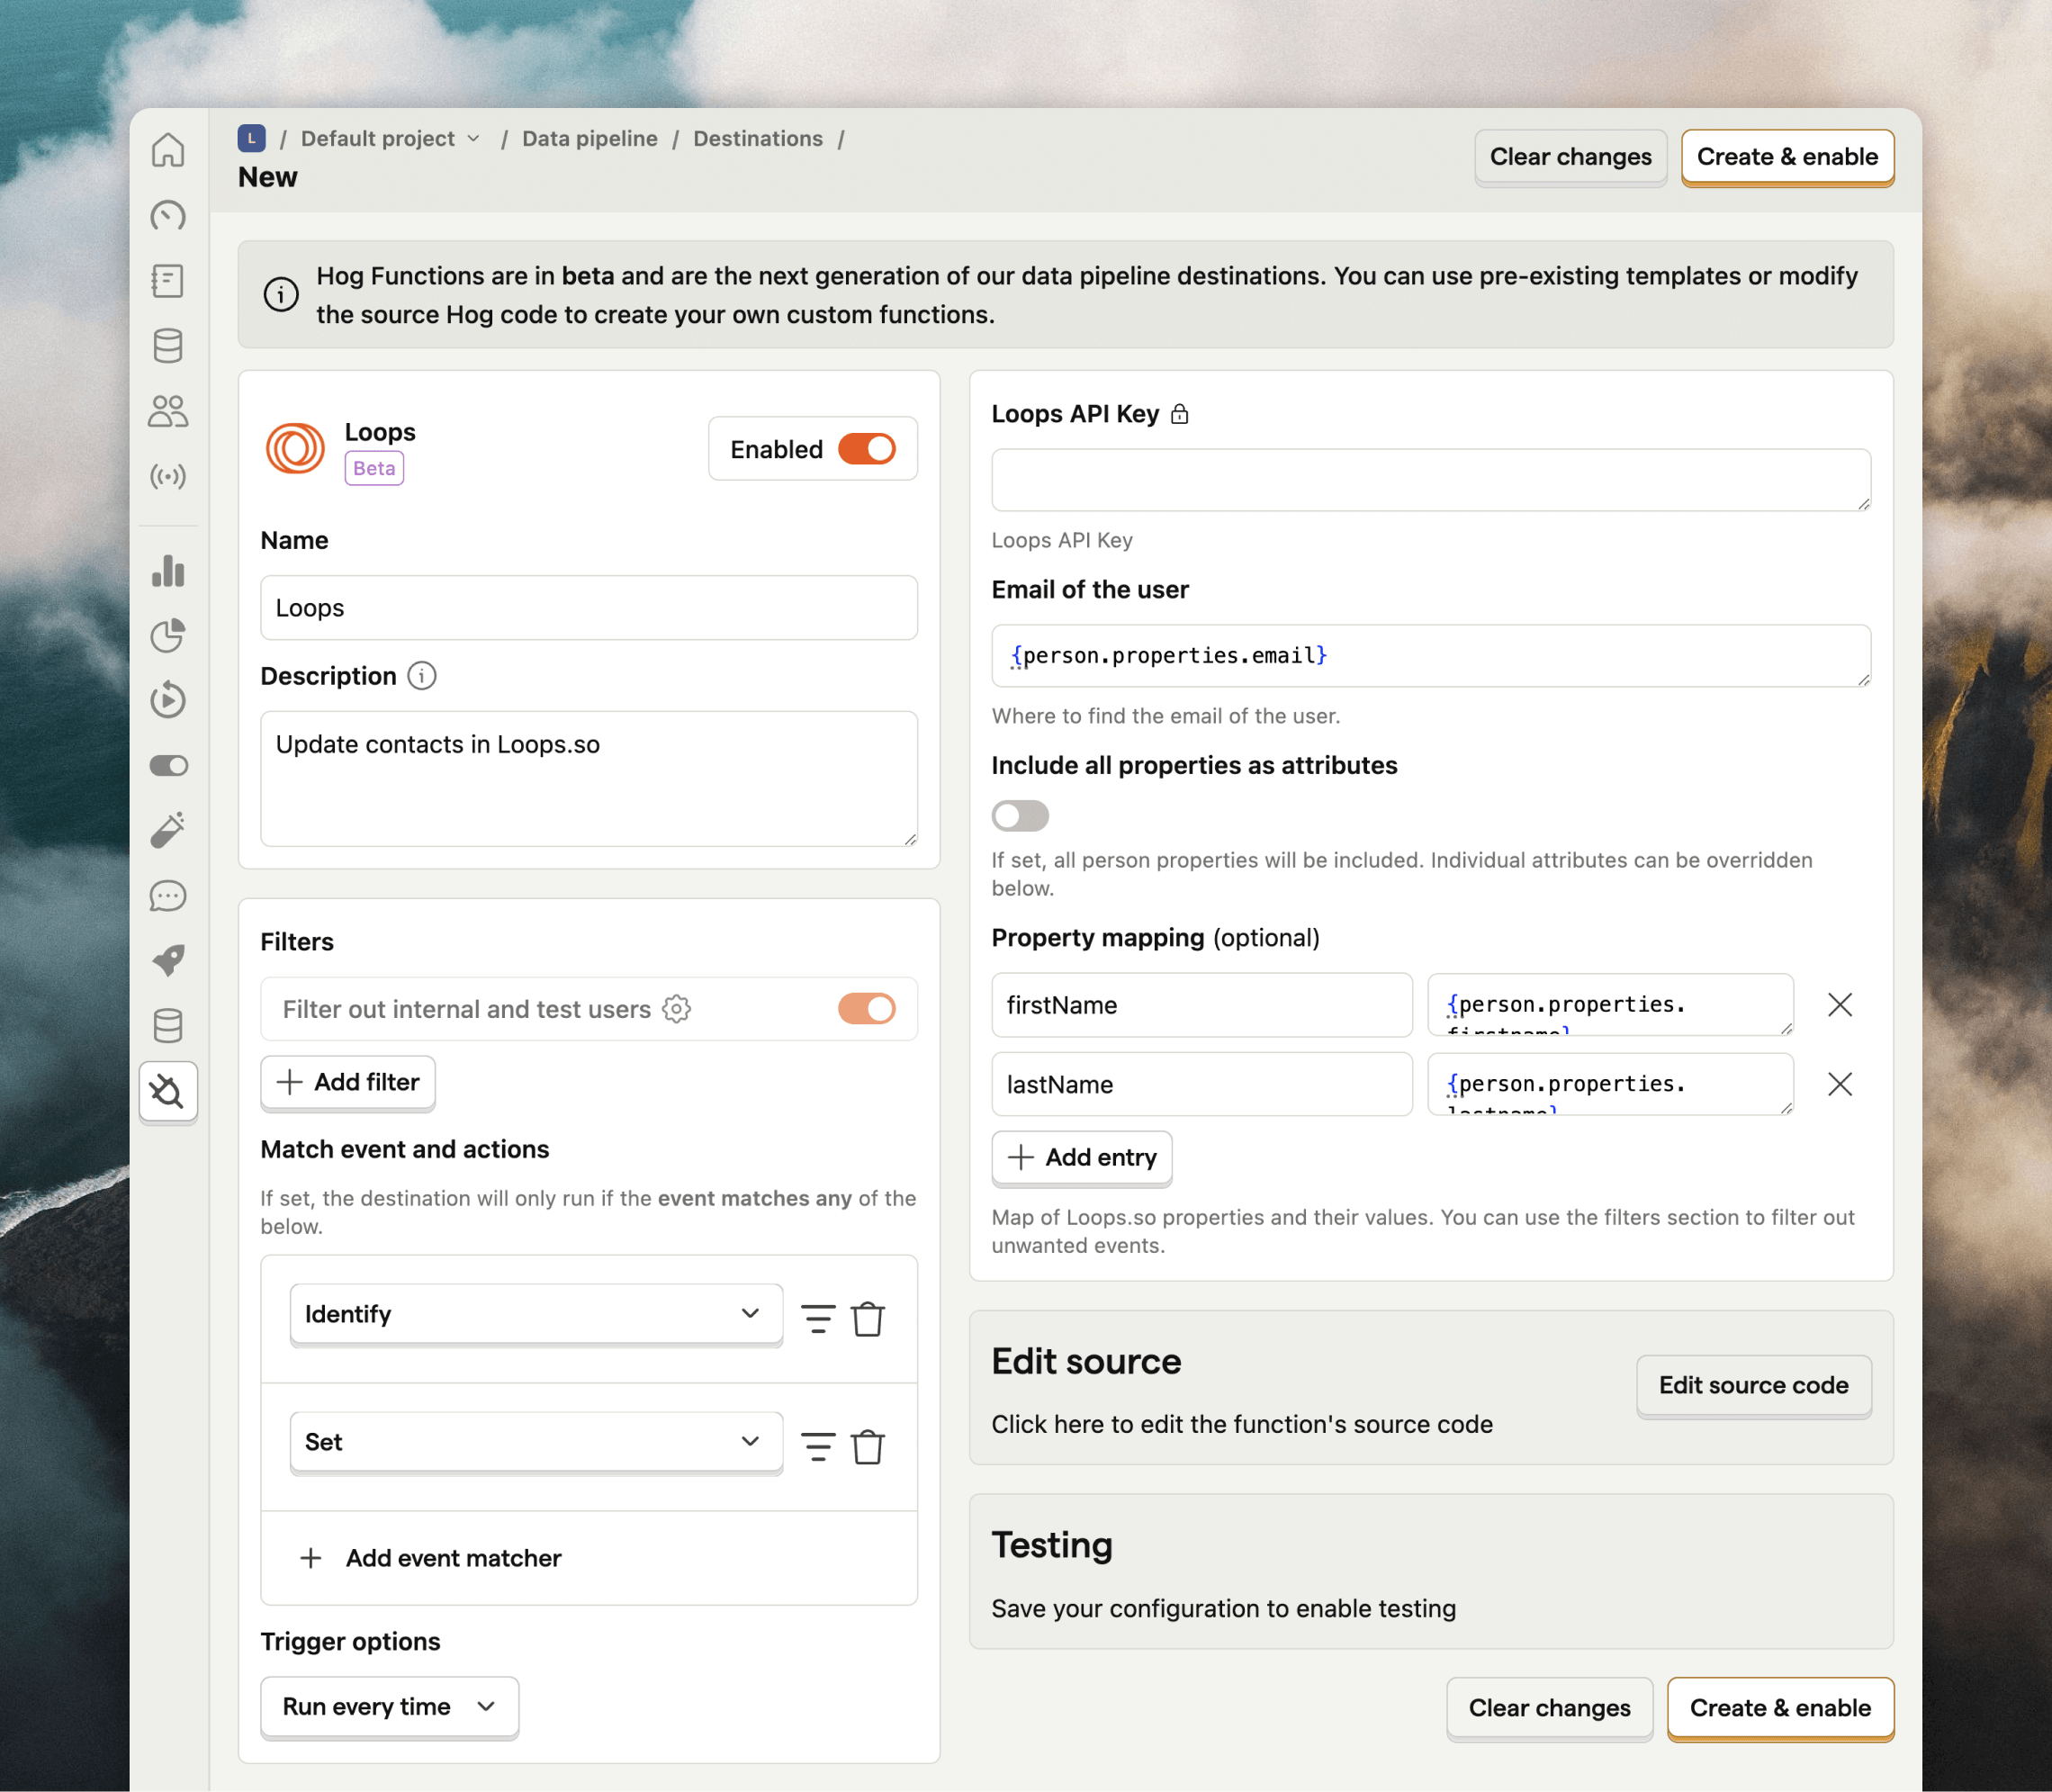
email, userId, firstName and lastName are synced to Loops. To add more contact properties you can use the Property mapping option, which allows you to map specific person data to contact properties in Loops. You can see all available contact properties in your account from Settings -> API. Make sure to use the “API name” when mapping values in PostHog.
If you check the Include all properties as attributes option, all properties from the person record in PostHog will be added to contacts in Loops. This may create a lot of custom contac properties in Loops, so we suggest running a mock test (see below) first to see which data would be sent.
Mailing lists
To add contacts to your Loops mailing lists, you need to make a quick code change to the destination. Click Edit source code on your destination’s page. For the updating contacts destination, edit lines 6–9 and add a newmailingLists section. Here, add your mailing list ID(s) and true (to subscribe the contact) or false (to unsubscribe).
mailingLists section. Here, add your mailing list ID(s) and true (to subscribe the contact) or false (to unsubscribe).
Testing
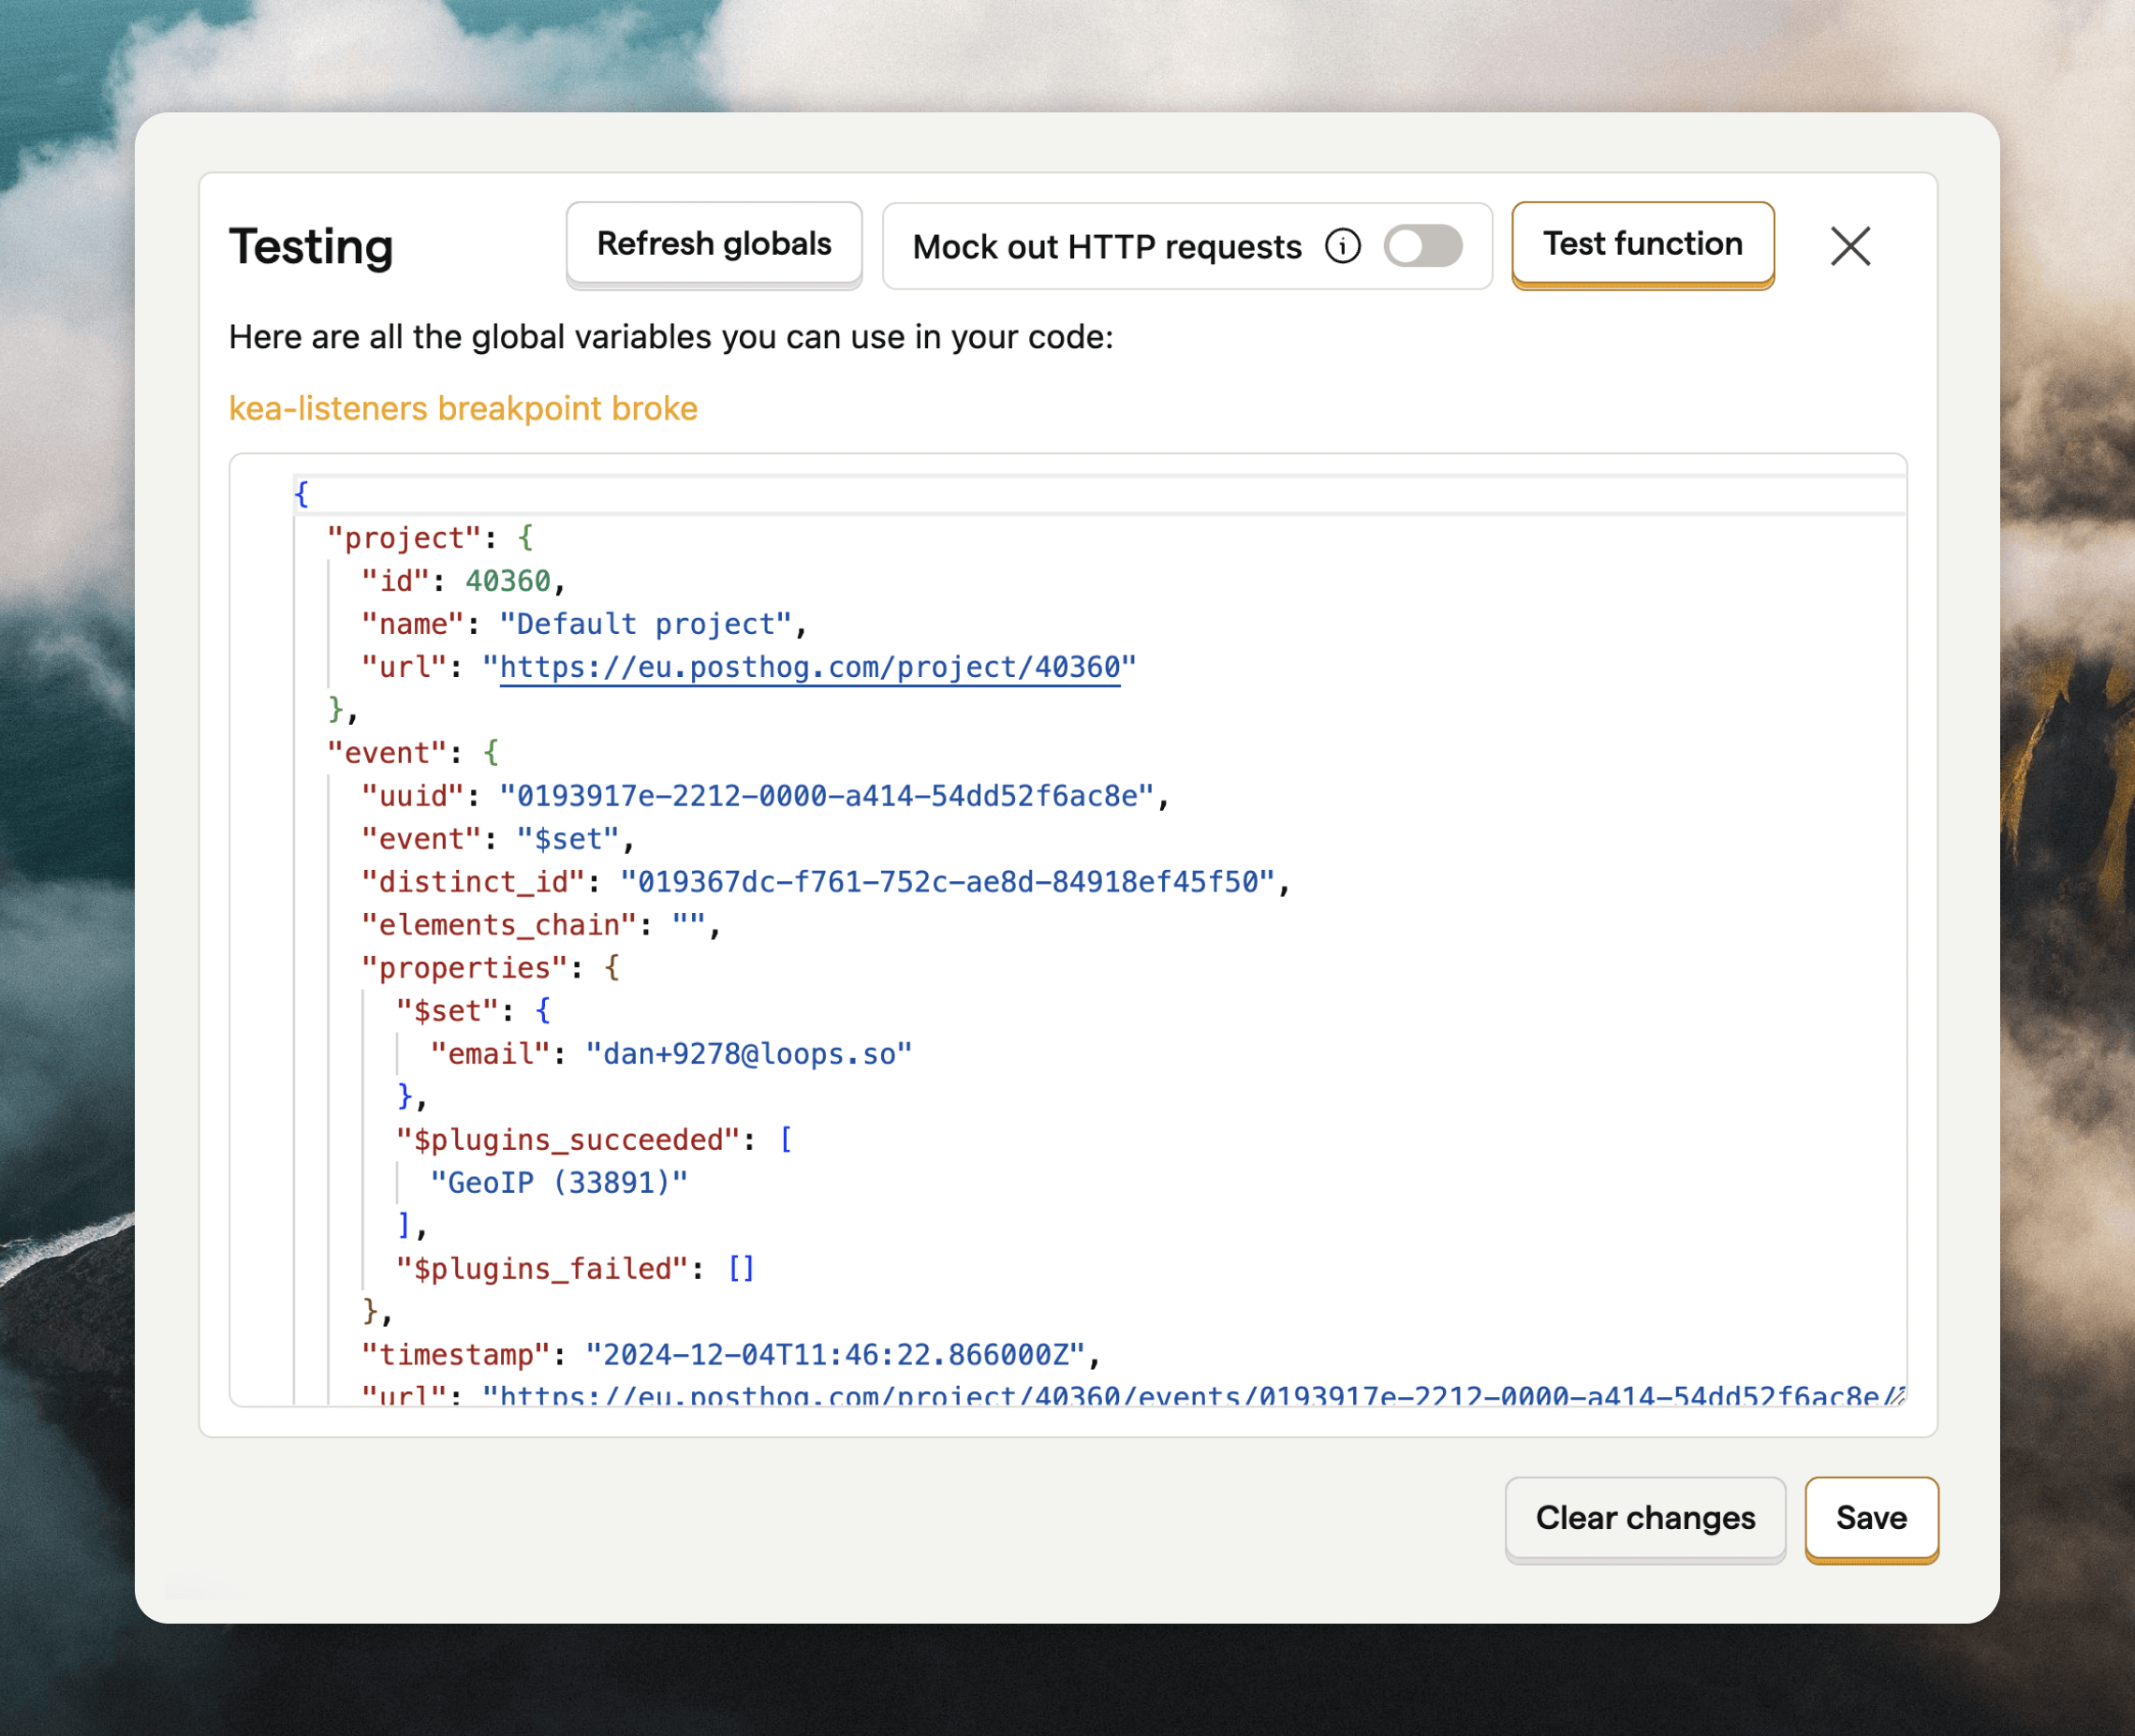
To test if your configuration is working as expected, expand the Testing section at the bottom of the page.